Cart (0)
No products in the cart.
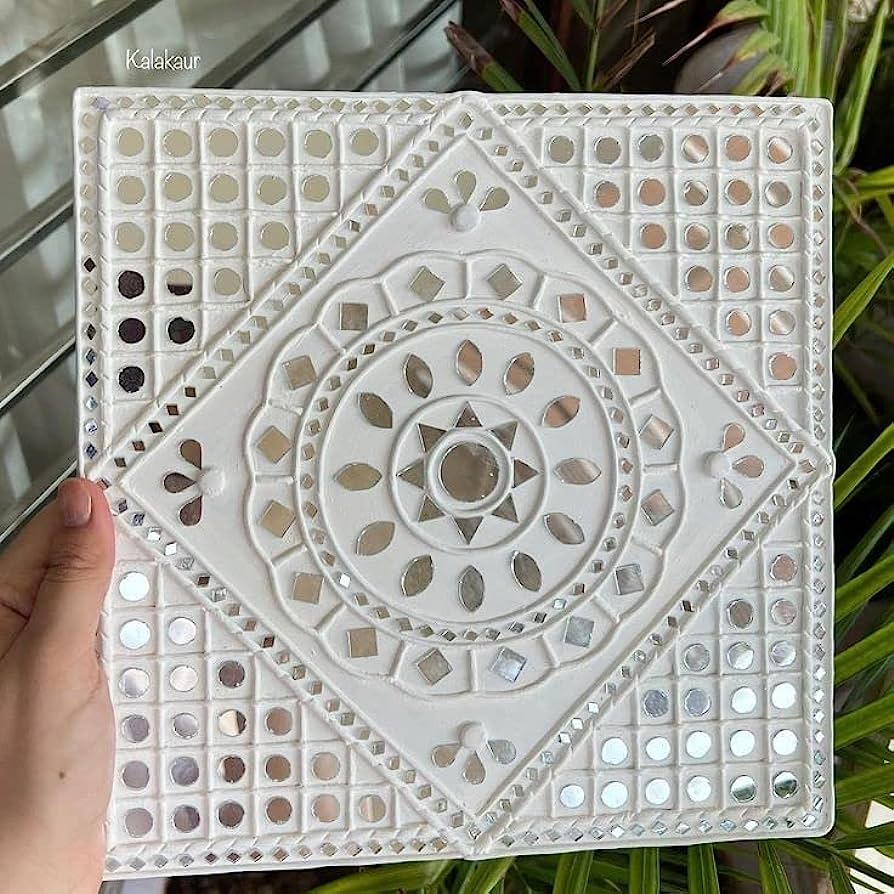
To prepare lippan art, you will need a few basic materials and follow a step-by-step process. Here's a general guide on how to create lippan art:
Materials needed:
1. Clay or mud (natural clay or terracotta clay is commonly used)
2. Camel dung (optional, but traditional)
3. Water
4. Mixing container
5. Wall or surface to apply the art
6. Basic tools (such as your fingers, a wooden spatula, or a sculpting tool)
7. Paint (optional, for coloring)
Step-by-step process:
1. Prepare the clay mixture:
- Take the clay or mud and break it into smaller pieces.
- Soak the clay in water for a few hours until it softens.
- Knead the clay with your hands to make it smooth and pliable. Add a little water if necessary, but be careful not to make it too wet.
2. Optional: Add camel dung to the mixture:
- If you choose to use camel dung, mix a small amount of dung with the clay.
- Knead and mix thoroughly until the dung is well incorporated. This helps to enhance the adhesive properties of the clay and improve its texture.
3. Prepare the wall or surface:
- Ensure that the wall or surface is clean, dry, and free of dust.
- If needed, apply a base coat of mud or clay on the wall and let it dry.
4. Apply the clay mixture to the wall:
- Take a small portion of the clay mixture and flatten it in your hands.
- Apply the clay to the wall in a thin, even layer using your fingers, a wooden spatula, or a sculpting tool.
- Smooth the clay with gentle strokes to create a uniform surface.
5. Create designs and patterns:
- Use your fingers or tools to shape the clay and create the desired designs and patterns.
- You can create geometric patterns, floral motifs, or any other designs of your choice.
- Experiment with textures and add details by making impressions or carving into the clay.
6. Let it dry:
- Allow the lippan art to dry completely. This may take a few days or more, depending on the thickness of the clay layer and the climate.
7. Optional: Paint the artwork:
- If desired, you can paint the dried lippan art to add color and vibrancy.
- Choose acrylic or water-based paints suitable for the clay surface.
- Apply the paint carefully, following the design and pattern you created.
Remember, lippan art requires practice and experimentation to master the techniques and achieve the desired results. It's a creative process that allows for personal expression and customization. Enjoy the journey of creating your unique lippan art!
Share:

Discover the beauty of modern Lippan art – a traditional Indian mud mirror art form reimagined for contemporary interior...

Are you ready to add some sparkle to your craft projects? Welcome to the glittering world of craft mirrors, Lippan art,...

In the vibrant realm of art and craft, mirrors play a pivotal role in enhancing creativity and adding a touch of sophist...
Crafting has always been an immersive journey into the realms of creativity, where every stroke, every color, and every...